A gentle guide to customization in TailwindCSS

A Frontend & Mobile Engineer with over 4 years of experience in the industry, I am passionate about creating engaging, user-friendly, and high-performing websites, mobile and web applications.
Introduction.
Hello there, welcome back to my blog. In the last article, we learnt about TailwindCSS and made some example code with it. I also said we would make a project with it, but I am still brainstorming on that, I need something small and simple, so I would continue brainstorming on that. But here in this article, we are going to learn how to customize TailwindCSS to our own color, font-family e.t.c.
If you are just hearing of TailwindCSS for the first time, you should read this for an introduction.
Why customize TailwindCSS?
Before I answer that question, I would like us to rewind back to the last article, I talked extensively about how Tailwind is 100% customizable, you don't need LESS or SASS to over-write styles, and you don't need to even write a single thing in CSS. Unbelievable right? Yeah, I know. That one of the million reasons I love this framework. Let me surprise you again, in Tailwind everything is customizable, from margin measurement to colors down to the border colors. Incredible!!!
So as a developer learning Tailwind for the first time, you may not see the reason to add your own customization since Tailwind has loads of color and fonts e.t.c to choose from, but a developer using Tailwind for company work or freelancing would need to customize the colors, font as the UI design of the company looks like or how the clients want it. Or maybe you are still sitting on the fence and trying to know if Tailwind is worth it, maybe you are just a savvy techy trying to play around with this tool to see it back and front, well here we are going to learn how to customize Tailwind to our own choice.
Before you scroll down, I made an amazing website, cloning Tailwind UI's official site, made it with TailwindCSS with my own customizations. Take a look at it here and tell me what you think.
I think you looked at the website above, it looks cool right?. Well, I did that without leaving my HTML, plus adding my own customizations without headache. Hooray!. Now let learn how you can make your own customizations. Ready? Let dive in.
Customizing TailwindCSS.
Like I previously said from the beginning, Tailwind made it possible to customize everything and anything, but in this article, we would be looking at how to customize:
- Colors.
- Font family.
Font weight.
I assure after learning these 3 up there and the whole concepts, you can pretty much customize anything you want in Tailwind.
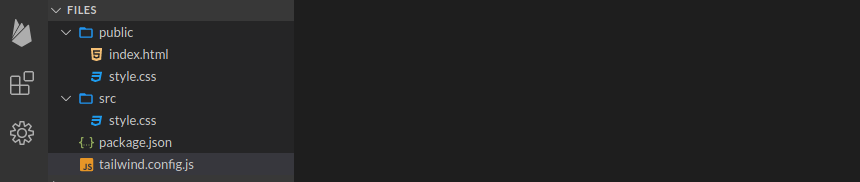
So starting out from where we stopped in the last article, I presume we still have that folder we used for installing Tailwind, if you don't know how that is done, please read the installation guide in this article.
Now let open our terminal in our preferred editor and install the Tailwind configuration file - a file that let's do the customization. Type:
npx tailwindcss init
Now you should see a file named tailwind.config.js.
Done? Good. Let the customization begin!!!.
Customizing Font family
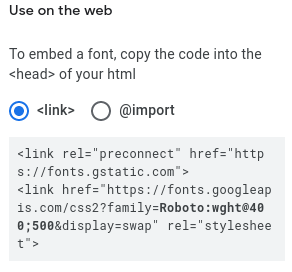
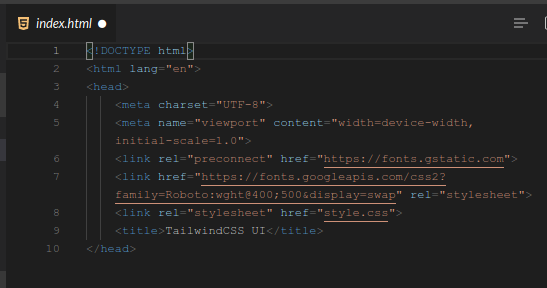
You probably need to make use of your own fonts rather than the default ones given by Tailwind, and that's okay. Let see how we can do that. We probably know of CDNs like Google fonts and Font awesome that provide millions of fonts for free. In this section, we would be using Google fonts, head over to the google font website, type the fonts you want( I will be using Roboto), click on it, select the style you want( I will be picking regular 400 and medium 500 and copy the link for your HTML page and paste it in your HTML page:
Now we open our tailwind.config.js and configure it.
module.exports = {
  purge: [],
  darkMode: false, // or 'media' or 'class'
  theme: {
fontFamily:{
      "rob": ['Roboto', 'sans-serif']
    },
    extend: {},
  },
  variants: {
    extend: {},
  },
  plugins: [],
}
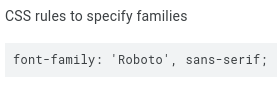
From the above, let deduce it. We added an object with the name fontFamily if you are familiar with Javascript you should know what that means, but if you are not, don't freak out, just follow the naming convention and the concepts on how it is done and you are okay, do this for 3 times more and you are a pro in customization. Now our objects have a key and a value. The key is the name we want the font to bear, so we can reference it in our HTML file, make sure to write it short, so you can do less typing and more productive work. The value is the name of the fonts and its fallback( incase the fonts is not available on Google again, which can't happen though), which in this case is Roboto and fallback sans-serif as seen on Google here:
Note: Follow the concepts up there, you don't need to write "font-family " again, the object name already specify that. Just pick the value and put them in a square bracket with quotes on them, and you are fine.
Now, if that is the only thing you wish to customize, go ahead and run :
npm run build:css
So the custom font can be built into your CSS file style.css through Tailwind. Test it now:
<h1 class="font-rob" > Hello there, I am Roboto" </h1>
Worked? Perfect. It didn't? No fears, just follow the installation guide here and continue to this blog, we are building from the previous installation. You can add as many font-family as you want and then reference them in your CSS styles.
Customizing Font weight
Here we go, remember I asked you to choose your style, either regular 400 or medium 500, which are what I chose, this are what would determine our font-weight, from the CDN link we can see that the weight we chose were included, so we just have to reference it. But if we like we may leave it and let Tailwind decide the font-weight for us. No? Ohhh... I see you really love doing your own thing right. Okay, let Jump in.

module.exports = {
  purge: [],
  darkMode: false, // or 'media' or 'class'
  theme: {
fontFamily:{
      "rob": ['Roboto', 'sans-serif']
    },
fontWeight:{
     "bold": "400",
    "extra-bold": "500"
},
    extend: {},
  },
  variants: {
    extend: {},
  },
  plugins: [],
}
That is it, easy peasy. Just specify it with the name of the font-weight and its value. Now go use it:
<h1 class="font-rob font-bold" > Hello there, I am Roboto" </h1>
If you are done customizing, run:
npm run build:css
This would add this font-weight configuration to your style.css through Tailwind.
Customizing Colors
Now let move to the last one for today's article. Maybe your client gave you some colors to add to the project which is really not in Tailwind colors by default, or the UI designer is screaming that he wants the exact color on the design to be replicated on the projects, relax... Tailwind got ya.
module.exports = {
  purge: [],
  darkMode: false, // or 'media' or 'class'
  theme: {
fontFamily:{
      "rob": ['Roboto', 'sans-serif']
    },
fontWeight:{
     "bold": "400",
    "extra-bold": "500"
},
colors:{
      "darkblue": "#161E2E",
      "ash": "#D1D5DB",
      "litash":"#374151",
      "white": "#ffff"
},
  extend: {},
  },
  variants: {
    extend: {},
  },
  plugins: [],
}
Yes, we did it, we added our own colors. Hooray!!!. Now that is the last customization for this tutorial, so let run it together.
npm run build:css
Now dust your palms, we are done here. Sweet right? I know. Any other customization you feel like making maybe changing the margin measurement or background image. You can come back to this blog and read again and use Tailwind Docs for the specific thing you want to change.
<h1 class="font-rob font-bold bg-ash text-darkblue" > Hello there, I am Roboto" </h1>
Conclusion.
Be aware that any value you customize in Tailwind, is what you are going to use throughout your project, you can't use the default value again. Example: Like the above where we customize colors, we can't use any inbuilt colors from Tailwind again, same goes for anything other value we customize. Maybe that Tailwind punishment for abandoning her colors she took time to create for you. Lol... Anyways, make sure you specify every color you need to use well because even the default white won't work, or maybe you should look through Tailwind colors very well to be sure your preferred color is not there.
Remember, we are going to build a little project with Tailwind here on this blog. So follow me to know when I would publish it. Once again look at this beautiful work here made with TailwindCSS and of course, I added my customization. You can add as many customizations to a specific style e.g colors, font-family e.t.c
If you have any questions concerning Go, Javascript, TailwindCSS, Open-source, or this article? You can reach me on Twitter here. Till next time, see ya. Thank you


