


Introduction
Hello there, Welcome back to this blog, today we are going to be looking at how we can get started with TailwindCSS, an open-source CSS framework.
Every software engineer is always looking for a tool that can perform the 80/20 rule, that is 20% work and 80% output and this does not exclude programming languages.
CSS has been perceived to be hard to master and therefore many open-source tools have sprung up such as Bootstrap, Bulma, and the rest, all aimed at minimizing the time and effort it takes to write CSS. In this article, we would be looking at TailwindCSS another amazing CSS framework aimed at bringing that 80/20 to reality.
Presiquites
This tutorial is aimed at beginners wanting to get started in a CSS framework and must have the knowledge of the following:
- Basic CSS.
- Basic HTML.
- Basic command-line knowledge
What is TailwindCSS?
TailwindCSS is a utility-first CSS framework packed with classes like flex, pt-4, text-center, and rotate-90 that can be composed to build any design, directly in your markup.
Utility classes help you work within the constraints of a system instead of littering your stylesheets with arbitrary values. They make it easy to be consistent with color choices, spacing, typography, shadows, and everything else that makes up a well-engineered design system.
Unlike Bootstrap where classes have been declared for you to use giving zero control over your CSS, making everyone who uses Bootstrap website look alike. But with TailwindCSS, you have only be provided with the utility classes and it is left to you to know what to use them for giving control over your CSS. TailwindCSS classes are easily understood by anyone even a beginner in CSS. Example: bg-orange-100, this simply means background: orange; the 100 stands for the density you need on the color, and with TailwindCSS you are given from 100-900 for you to choose from.
Why TailwindCSS?
This may be a question from a total beginner or an experienced CSS framework user. Well, I asked that same question myself. Tailwind gives the freedom to make customization, use utility classes and it is very low level and basic for anyone wishing to start using the CSS framework. A total beginner in CSS can pick this up and get familiar with it in an hour or 2. Some reasons why you should choose TailwindCSS:
- Easy to understand CSS class name.
- Memorable class name.
- Beginner friendly.
- No rules on how you use class names.
- Totally customizable - You don't need SASS or LESS to overwrite styles.
- Utility-first classes. With Tailwind you can build a fully functional website frontend without ever leaving your HTML.
TailwindCSS classes and Output
Below is a simple example of how Tailwind utility classes work
<div class=" bg-indigo-500 text-white px-4 py-4">
<h1> Hello </h1>
</div>
Output:
 Let's deduce the above, First, we created a
 div giving it a Tailwind class of:
bg-indigo-500: A background color of indigo with a density of 500.text-white: All text in thisdivshould be white in color.px-4: Give thedivpadding 4 on the x-axis which is left and right.py-4: Give thedivpadding 4 on the y-axis which is top and bottom. From the output above we can tell that the classes worked!.
Basic Utility classes and their meaning.
We would go over some utility classes in this section and their meaning but bear in mind, this is simple and can be taken as you are writing your own CSS only that you are doing it in your HTML file. Let dive in.
bg-red-100: A background of red with a density of 100, you can choose from100-900.mt, mb, mr, ml: Simply means margin-top, margin-bottom, margin-right, margin-left. You can therefore usemxandmyto get the x-axis(left and right) and the y-axis(top and bottom).pt, pb, pr, pl: Simply means padding-top, padding-bottom, padding-right, padding-left. You can also usepxandpyto get the x-axis(left and right) and the y-axis(top and bottom).text-orange-200: A text with the color of orange with a density of 200.b-gradient-to-r from-pink-200 to-red-500: This gradient in CSS, coming from the left to right having the color pink at the left then transforming to red at the right.text-center- This is the same as writingtext-align: center;.font-bold- The same as writingfont-weight: bold;.With TailwindCSS classes as you can see up there, they are very and very basic. It is also similar to CSS properties names. You can always look at the documentation to get the name of any class you feel your CSS needs.
Another Tailwind example:
<div class="bg-gradient-to-r from-yellow-400 via-red-500 to-pink-500 p-10 text-white font-bold text-lg text-center">
Hello there! My name is Franklin and we are learning TailwindCSS </div>
Output:
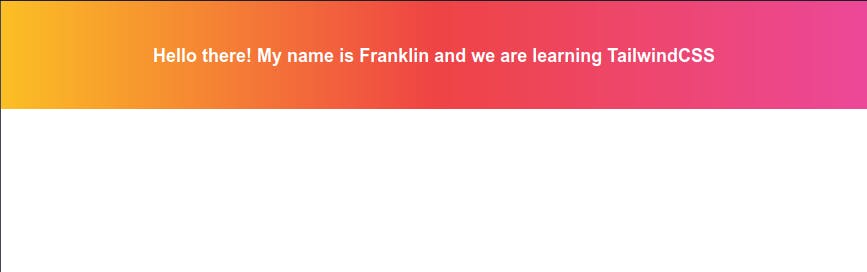
After this example, I think I laughed hard trying to recollect the number of lines I would have written in CSS, but I just spun this of with Tailwind, without leaving my HTML.
Installation guide.
Now that we have seen how amazing Tailwind can be, let look at how we can use it in our project by installing it in our local machine. According to the documentation, there are two ways of installing TailwindCSS.
- Installation via npm
- Using it via CDN - This comes with a lot of limitations.
In this section, we shall be setting up our environment to be able to use Tailwind, follow along, let explore this sweet framework.
- First things first, Open up your preferred Code editor, I use Visual studio code. Make sure you are connected to the internet, as
npmwould need the internet to install Tailwind. Done? Good.
Now name a folder you would love to use to practice this installation, any name at all. Now open it in your code editor.
Let create a package.json file to manage our dependencies which in this case is our Tailwind we want to install.
Open your terminal in your code editor with your folder opened.
Type:
npm init -y
Done? Good. We are getting there.
We are going to learn how to structure our folders. Create a folder named "src", and in the folder create a CSS file. This would be used to import our tailwind base, components, and utilities styles.
/* in your src/style.css  paste the tailwind directives */
@tailwind base;
@tailwind components;
@tailwind utilities;
We are getting there. And you are doing fine, am proud of you.
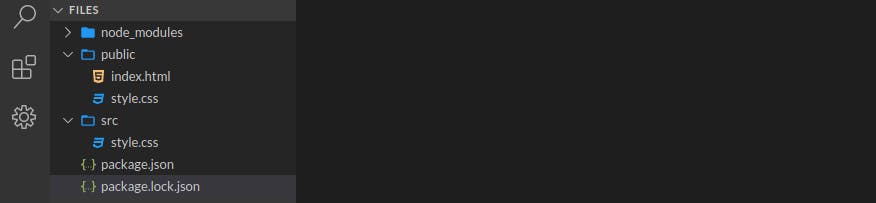
- Second step, let create a folder name it anything but am calling mine "public", in this folder create the HTML file we would write the markup in and the CSS file where we shall build our
srcfile into.
Your structure should like this: .
We are ready to install Tailwind, our folder is set!
.
We are ready to install Tailwind, our folder is set!
Now open the terminal and type:
npm install tailwindcss@latest autoprefixer@latest
Since Tailwind does not automatically add vendor prefixes to the CSS it generates, we recommend installing autoprefixer to handle this for you as we've shown in the snippet above.
Now to check if Tailwind is truly installed. Check your package.json file and you see something like this:
"keywords": [],
  "author": "",
  "license": "ISC",
  "dependencies": {
    "autoprefixer": "^10.1.0",
    "tailwindcss": "^2.0.2"
  }
}
Indicating that the dependencies and their versions. Did it work? Good. You are killing it. And a file named package.lock.json and the node_modules folder, would be present. Like this:
- Last step: Now let build Tailwind and export the classes to our style sheet ready for us to use. Open your
package.jsonlocate thescriptskey and let edit to this:"scripts": { "build:css": "tailwind build src/style.css -o public/style.css" }src/style.cssand export to our own style sheet in thepublic/style.css
Now open your terminal and run:
npm run build:css. Now check your public/style.css to confirm. Cheers!!! We just installed TailwindCSS. Horray.
Don't forget to link to public/stylesheet to your HTML file.
<link rel="stylesheet" href="public/stylesheet">
This installation may look foreign to you and that is okay, do it 3 more times and it would stick, in this article, I talked about consistency as a developer, doing it consistently would make it stick, and you can always go back up and read through again in case you get stuck. Congratulations on choosing Tailwind.
Resources.
Conclusion
Thanks for reading, in the next article we would build something with Tailwind, so follow me to be notified when it is posted.
Do you have any questions concerning Go, Javascript, Tailwind, Open-source? You can reach me on Twitter here. Till next time, see ya. Thank you